
Processing Scanned Images
We’re doing high-res scans (600dpi) of all issues (front and back) and our master images are 3200px wide. Sometimes, super small issues (pins, rockers/pieces) need to be scanned at a higher resolution to avoid fuzziness. The system generates all the various sizes on upload.
Here is a walkthrough of using Photoshop to process images.
You can also use other software such as GIMP (Open Source Photoshop), Graphic Convertor, and more. If you have an image program you'd like to use, drop us a line and we'll figure it out together.
There are other modules in the Admin Help that will walk you through how to scan for the best final images in PatchVault.
If you’re not comfortable with Photoshop/Photoshop Elements or image editing, let me know and we’ll figure out how to get you support on that front. We want to ensure the images are as close to reality as possible, especially with a/b/c issues.
White border patches are the devil and any LEC that issues them should be marched outside and flogged with aforementioned patch. I might be joking. Silver Mylar is a close second.
[Photoshop] Elements gets enough of what you need. The trick with the magic wand is to drop the tolerance down. I normally run at 64, but for white border patches, I get down to 32 or 16 even. I still tend to have to use the magic paint brush or lasso to unselect parts.
My Basic Process
- Open the image
- Run Levels (not auto levels). I tend to kick black from 0 to 10, midrange from 1 to 1.1, and then I bring the white down until it looks right (typically to 235 or 245 depending on the scans).
- Run the magic wand to select the background/area around the patch
- Fix the selection issues
- Feather the selection (Shift-F6 or the select menu, 15 px feather)
- Run levels on the “white” area, dropping the 255 to 150 or 100 depending on how much noise is there.
I then copy each patch to the PSD file as a front and back layer, name it appropriately, and size it. You can save each one manually at this point, but I’ve started doing a ton and then letting photoshop run for 20 minutes exporting layers to images (PNG no transparency). I then clear off the _0006_ or whatever is tacked on the beginning of the file name.
Q: Finally, how do I “size” it for saving and exporting to PNG for upload?
I copy the image front and back to layers and name them. I then select the layers (together) and size them to the guides:
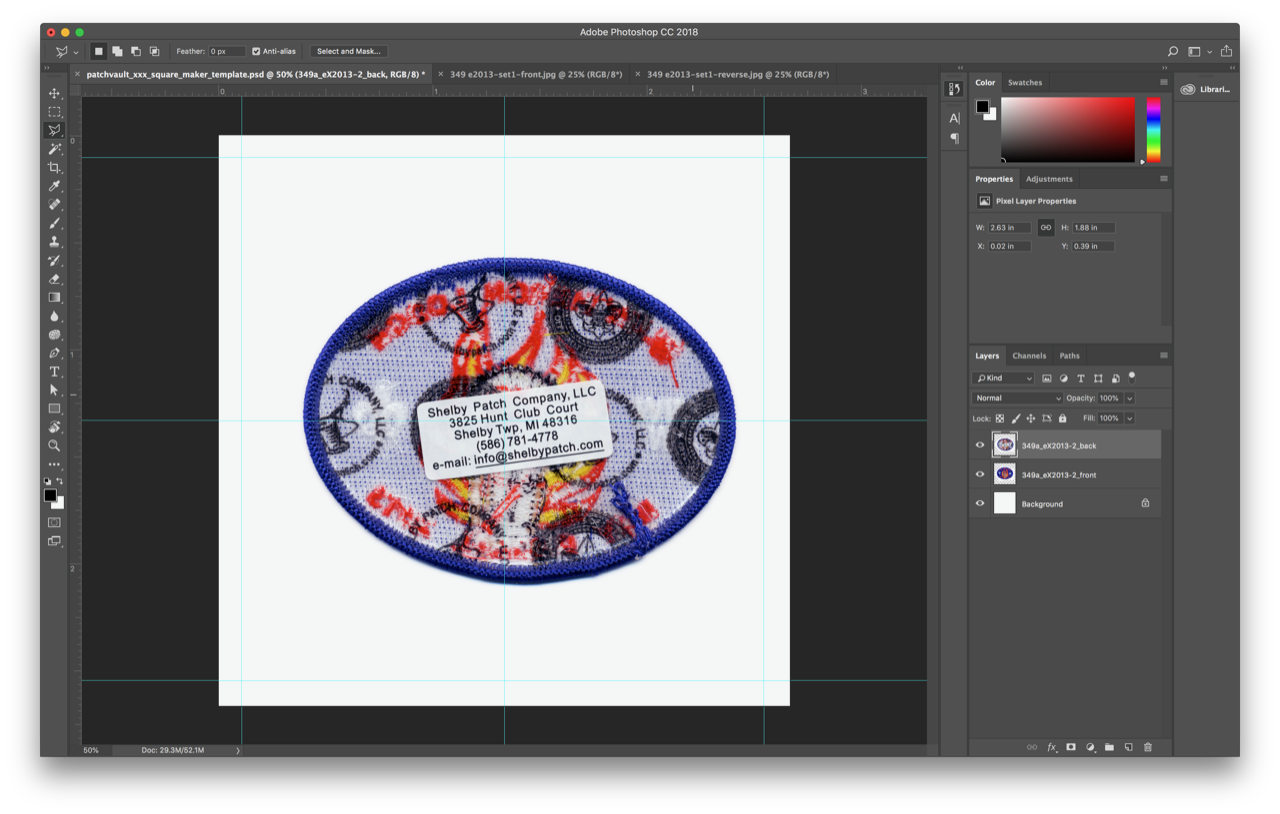
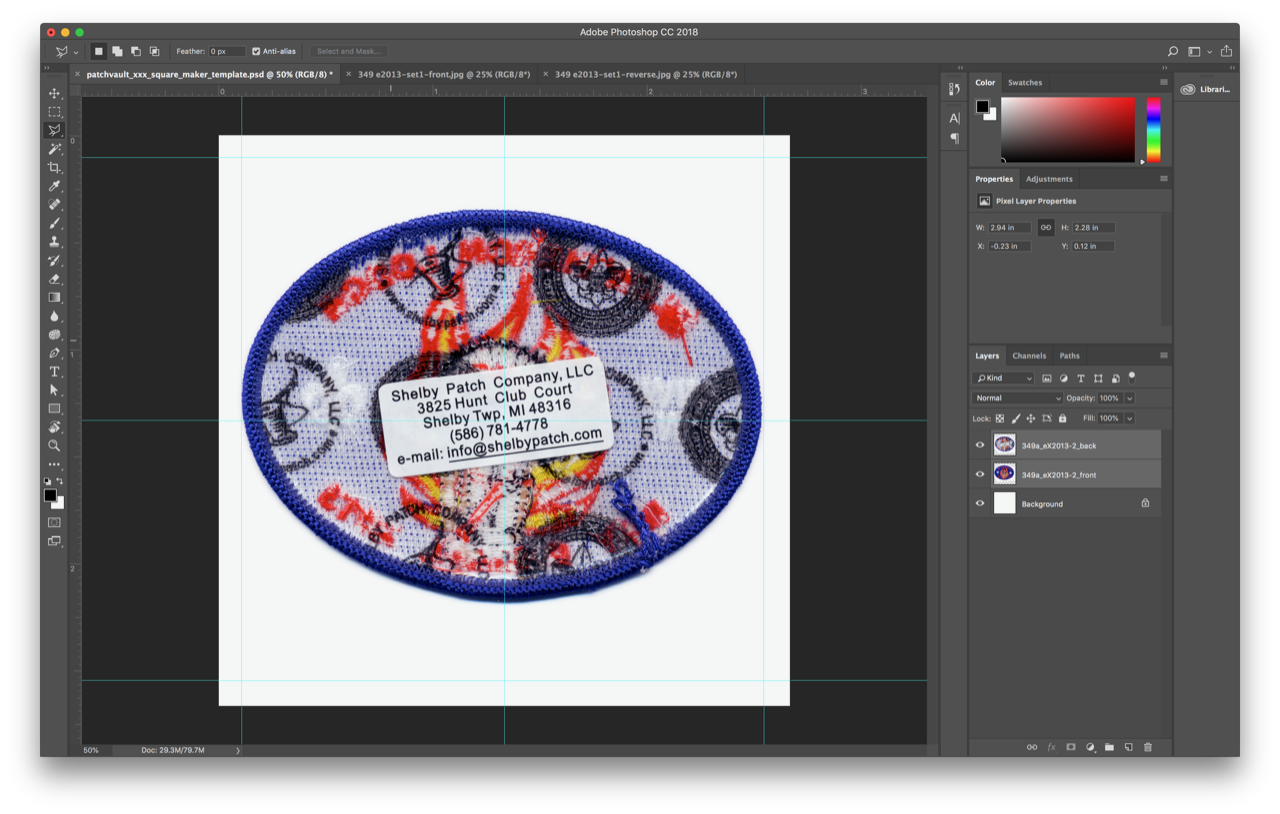
At this point I look at each layer, center it (where the guides cross) and align it. All of this I’m doing with free transform (command shift T). If you hold down option and shift it scales it proportionally from the center.
From here, you can either manually save for web, or do the export layers.
File > Export > Layers to Files
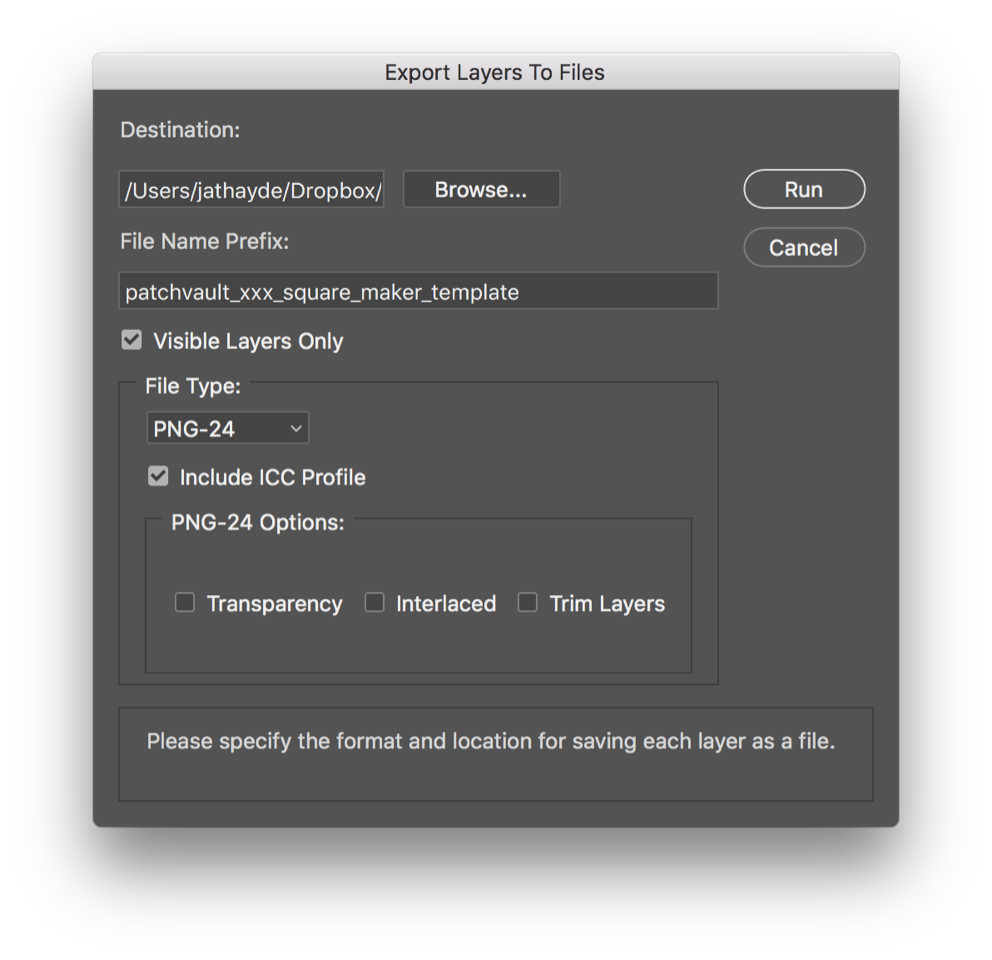
Browse to where you want these saved. Delete everything in “file name prefix”. Make sure that transparency is turned OFF.
Your layer name becomes the filename and ‘.png’ is added. You’ll have _0001_filename.png so you’ll need to edit the file name in the finder to remove the first 6 characters.
So for flaps, it’s similar except I line it up along the top as opposed to centering as I do with Xs and other odd shapes. Use Free transform, and hold down shift to keep the image proportional.
If you’re using Photoshop Elements, you’ll need to “Save for Web” or Save as a PNG, 24 bit, no transparency, not interlaced. PatchVault makes and optimizes all the file sizes on upload, so you just need to make the master 3200px wide image and the system does the rest of the work.
You can also do this work with GIMP or Graphic Convertor (Dave Scocca did all of Nentico with this tool and can provide pointers there)